 Save to Pinterest
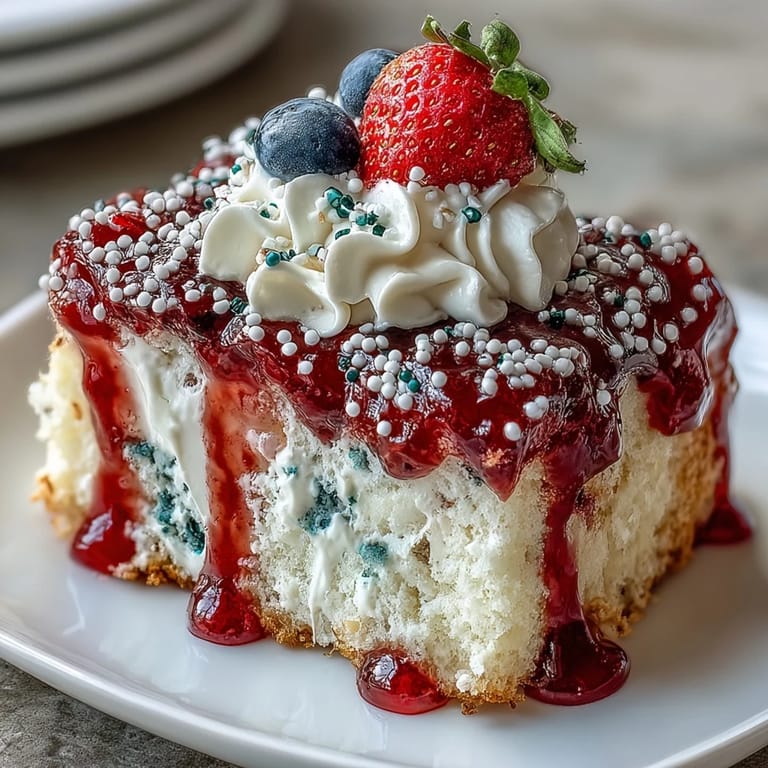
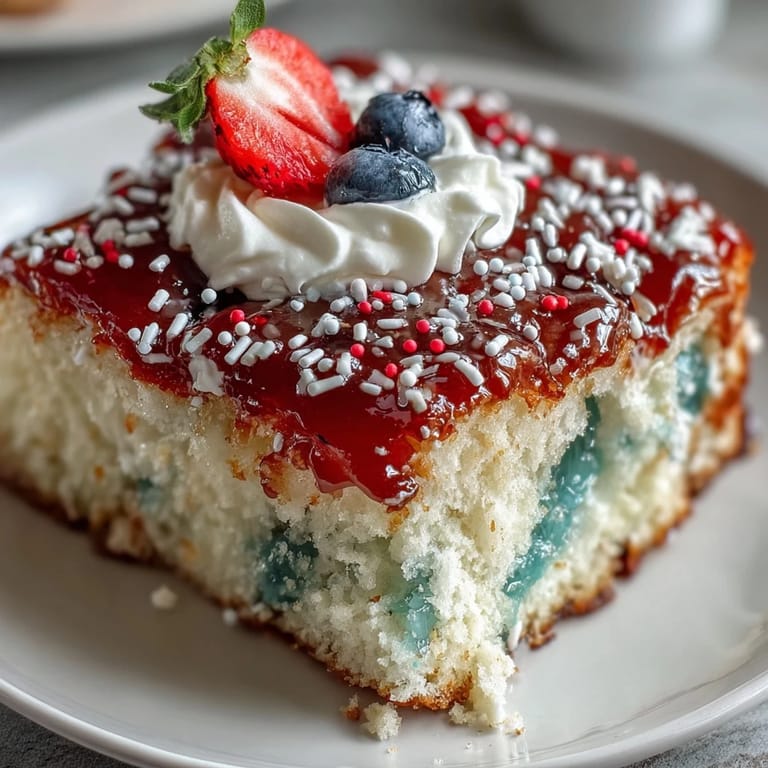
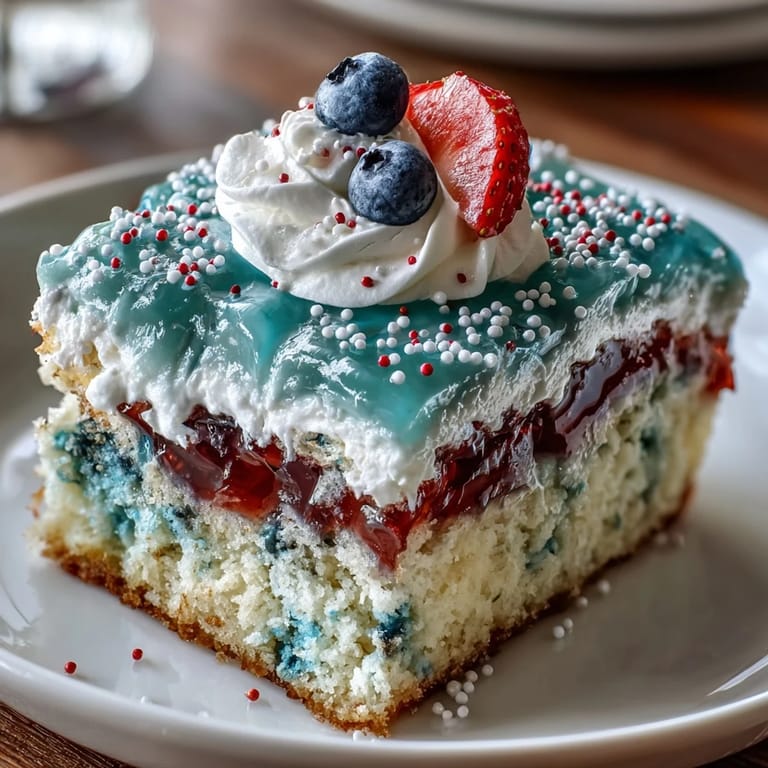
 There&aposs something infectious about the energy in my kitchen on Memorial Day—the scent of cake baking while red and blue gelatin waits impatiently on the counter, ready to bring a festive pop to an otherwise plain canvas. One year, a sudden sunshower kept us indoors most of the afternoon, and I found myself humming along to oldies as I swirled vibrant colors through the still-warm cake. The whole process felt like painting a flag with food and anticipation. You can practically hear summer setting in as you drizzle gelatin into every little pocket. I love how this poke cake becomes an edible celebration in itself.
I remember last year when my nephew insisted on helping poke holes in the cake; his uneven polka dots turned out to be the best mistake, creating a playful patchwork of color that got more compliments than any perfectly measured design ever did. Someone even snapped a photo before we poured on the fluffy whipped topping, because it looked so cheerfully homemade. That little moment of camaraderie and mess always reminds me why I love letting others help in the kitchen.
Ingredients
- White cake mix: The base for this cake needs to be extra tender and neutral so the gelatin really shines through; I've found the boxed versions turn out perfectly fluffy every single time.
- Water: Measured with care, this keeps the cake light—too much or too little alters the texture.
- Vegetable oil: Don't swap this for butter; oil is what ensures the crumb stays soft and springy after all that chilling.
- Eggs: Bringing the eggs to room temperature makes mixing easier and prevents dense spots.
- Strawberry or cherry-flavored gelatin: This is your vibrant red, and after years of tinkering, I think cherry produces the deepest stripe, but strawberry is the crowd-pleaser.
- Berry blue gelatin: The unmistakable blue is a must for that patriotic look—let it dissolve fully before pouring or you get streaky sections.
- Boiling water: Absolutely essential for dissolving the gelatin; I measure it after it hits a rolling boil for accuracy.
- Cold water: Cools the gelatin just enough to avoid melting the cake while still letting it seep into those holes.
- Frozen whipped topping, thawed: Topping the cake with this cloud-like layer hides any pokes or spills; give it 20 minutes on the counter to thaw evenly.
- Red, white, and blue sprinkles: No one is above loving a generous sprinkle finish; I shake them on right before serving for the crunchiest effect.
- Fresh strawberries and blueberries (optional): If you want a little extra tartness and color, dot these on top right before you bring it to the table.
Tired of Takeout? 🥡
Get 10 meals you can make faster than delivery arrives. Seriously.
One email. No spam. Unsubscribe anytime.
Instructions
- Get Ready:
- Set your oven to 350°F and grease a 9x13-inch pan, taking a moment to breathe in the calm before the baking begins.
- Mix and Bake the Cake:
- Combine cake mix, water, oil, and eggs—the mixer will hum as everything comes together—then spread the batter in the pan for a perfectly even bake.
- Let It Cool and Poke Away:
- Once baked, let the cake cool just enough to handle, then use a wooden spoon handle to poke holes every inch or so; don&apost worry about being too precise, each hole is a chance for flavor to sneak in.
- Prepare the Red and Blue Gelatin:
- Dissolve each gelatin flavor separately with boiling water first, then stir in cold water—the colors and aromas will instantly liven up the kitchen.
- Pour the Color:
- Slowly spoon the red mixture over half the poked holes and the blue over the others; watch them cascade through the cake to create a marbled wonder, then let it chill for at least two hours for a set that won't spill.
- Add the Finishing Touches:
- Spread whipped topping in a fluffy blanket over the chilled cake, then scatter sprinkles and, if using, nestle fresh berries over the top.
- Serve with a Smile:
- Cut into squares and serve chilled, letting the colors and coolness bring smiles around the table.
 Save to Pinterest
 The best compliment I ever received for this cake was from a neighbor who said it felt like eating happiness after a long day spent outdoors; those lazy evening conversations, plates balanced on our knees, made my kitchen efforts feel truly worthwhile.
Make-Ahead and Storage Advice
After making this a few times, I've realized it actually tastes better the next day since the colors intensify and the flavors soak in overnight. Wrap the pan tightly with foil or plastic wrap, and you'll find the cake just as moist and festive as when you first made it.
How to Get Clean, Colorful Slices
For picture-perfect slices, use a sharp knife dipped in hot water and wipe it clean between each cut. This keeps the whipped topping looking neat and the red and blue layers distinct, avoiding those muddled edges that come from rushing.
Adding Your Own Twist
If you're feeling adventurous, swap out the gelatin flavors for raspberry and grape or toss in a layer of lemon curd for a hint of tartness. Let the kids dress up the cake with extra fruit or make personalized sprinkle patterns for a bit of creative chaos.
- Don&apost rush the chilling step—impatience leads to runny colors.
- Changing up the berry toppings can make everyone believe it&aposs a brand new creation each time.
- Always read ingredient labels if serving to anyone with allergies.
 Save to Pinterest
 Whether you're celebrating with a big crowd or just want something bright for a small gathering, this poke cake brings a cheerful splash to any table. Enjoy the playful process and the grins with every colorful forkful.