 Save to Pinterest
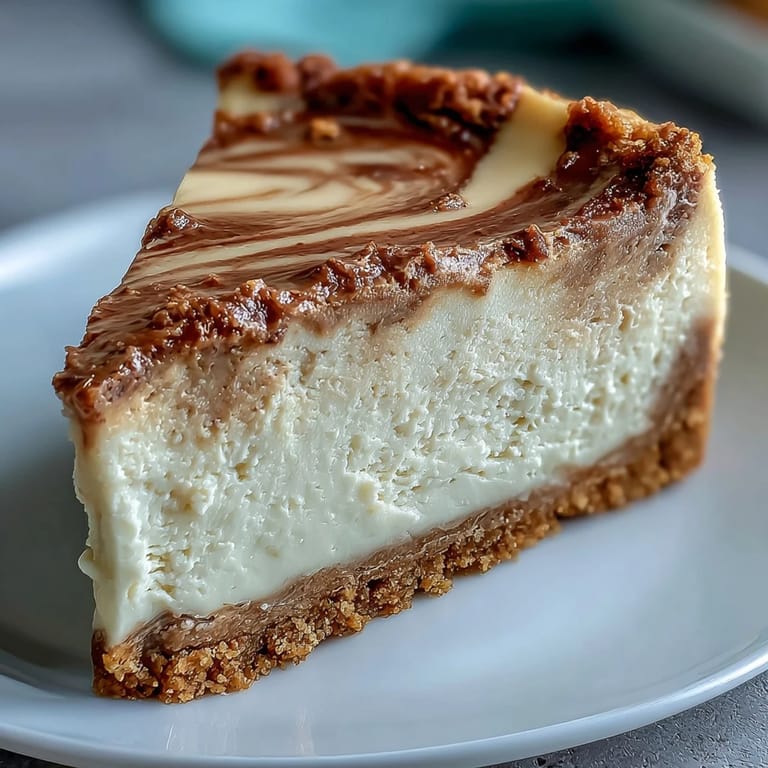
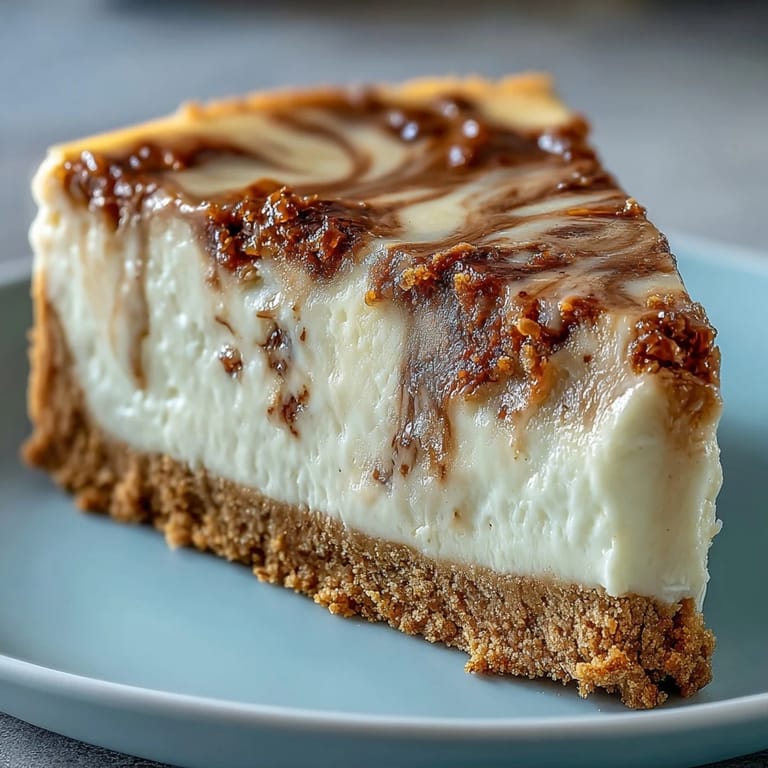
 My first encounter with hojicha cheesecake happened at a small tea café in Tokyo, where the owner casually mentioned she'd been experimenting with roasted tea in desserts for months. The moment that slice arrived at my table—cream-colored with those gorgeous brown swirls running through it—I understood why she'd been tinkering. It wasn't just creamy or sweet; it had this warm, almost nutty depth that made me want to slow down and actually taste it. Back home, I became obsessed with recreating that balance, and after several attempts in my own kitchen, I finally nailed it.
I baked this for a dinner party last fall, and one guest—someone who usually skips dessert—went back for seconds without asking. Watching her close her eyes while eating a slice made me realize this wasn't just about nailing a recipe; it was about creating something that genuinely moves people. That night cemented why I keep making this.
Ingredients
- Graham cracker crumbs (200 g or about 2 cups): Crush them fairly fine so the crust binds properly when pressed; too chunky and it won't hold together once baked.
- Unsalted butter, melted (90 g or 6 tbsp): This is your glue, so don't skimp on it, and make sure it's actually melted and not just warm.
- Granulated sugar (2 tbsp for crust, 150 g for filling): The crust sugar adds a subtle sweetness to balance the tea; the filling sugar needs to be fully dissolved into the cream cheese or you'll get gritty texture.
- Salt (pinch for crust): A tiny pinch elevates the graham cracker flavor without making anything salty.
- Hojicha loose leaf tea or tea bags (2 tbsp or 2 bags): Loose leaf gives you more control over steeping time; bags are convenient but sometimes the flavor is less pronounced—adjust steeping time based on what you choose.
- Heavy cream (120 ml or ½ cup for hojicha, ½ cup for filling): The cream carries the hojicha flavor beautifully and keeps the cheesecake silky.
- Cream cheese, softened (450 g or 16 oz): Softened means actually soft—leave it out for 30 minutes at room temperature or it won't blend smoothly and you'll end up with lumps.
- Eggs (2 large): Add them one at a time and mix gently; overmixing at this stage introduces air bubbles that can cause cracks.
- Sour cream (120 ml or ½ cup): This adds tang and moisture; don't substitute with Greek yogurt as it changes the texture too much.
- Vanilla extract (1 tsp): A small amount that rounds out the flavor without competing with the hojicha.
- All-purpose flour (1 tbsp): This stabilizes the filling slightly without making it dense or heavy.
Tired of Takeout? 🥡
Get 10 meals you can make faster than delivery arrives. Seriously.
One email. No spam. Unsubscribe anytime.
Instructions
- Prepare your pan and preheat:
- Line the bottom of your springform pan with parchment paper and preheat the oven to 160°C (325°F). This temperature is lower and gentler than standard baking—it prevents cracks and keeps the filling creamy.
- Build the crust:
- Mix graham cracker crumbs with melted butter, sugar, and salt until it feels like damp sand, then press it firmly into the pan bottom and bake for 10 minutes until lightly golden. Let it cool completely before adding filling; a warm crust can start cooking the bottom of your cheesecake unevenly.
- Steep the hojicha:
- Heat heavy cream until it's just steaming (don't boil it), pour it over the hojicha tea, cover, and let it sit for exactly 10 minutes. This creates a concentrated, fragrant infusion without bitterness that comes from over-steeping.
- Blend the filling:
- Beat softened cream cheese until it's completely smooth, then add sugar and mix until combined. Add eggs one at a time, beating gently after each one, then fold in sour cream, vanilla, and flour—stop mixing as soon as everything is combined.
- Create the hojicha swirl:
- Set aside about ⅓ cup of plain batter in a separate bowl and mix in your cooled hojicha cream until the color is even. Pour the plain batter over the crust, then drop generous spoonfuls of the hojicha mixture on top and swirl gently with a skewer or knife—the swirl should look intentional but not overdone.
- Bake with care:
- Place the springform pan on a baking tray (this helps with even heat distribution) and bake for 40–45 minutes until the edges look set but the very center still jiggles slightly when you gently shake the pan. That jiggle means it will finish cooking as it cools.
- Cool slowly in the oven:
- Turn off the oven, crack the door open about 2 inches, and leave the cheesecake inside for a full hour. This gradual temperature drop is what prevents the dreaded cracks that happen when cheesecake cools too quickly.
- Chill thoroughly:
- Remove from the oven and cool to room temperature at your kitchen counter, then refrigerate for at least 5 hours (overnight is ideal). Cold cheesecake slices cleanly and flavors develop beautifully during this resting time.
 Save to Pinterest
 There's a moment when you take that first bite of a chilled slice and the hojicha flavor isn't harsh or overwhelming—it's whisper-soft, almost like the cheesecake is reminding you it has a story to tell. That's when you know you've made something worth the wait.
Finding Your Perfect Hojicha
Not all hojicha is created equal, and I learned this the hard way after my third attempt tasted slightly bitter. Good hojicha has this warm, toasted quality without any sharp edges—it should smell almost like caramel and roasted grain, not acrid. Hunt for hojicha from Japanese tea shops or trusted online retailers where you can actually smell it or read detailed reviews. The difference between mediocre and excellent hojicha is genuinely noticeable in the final cheesecake.
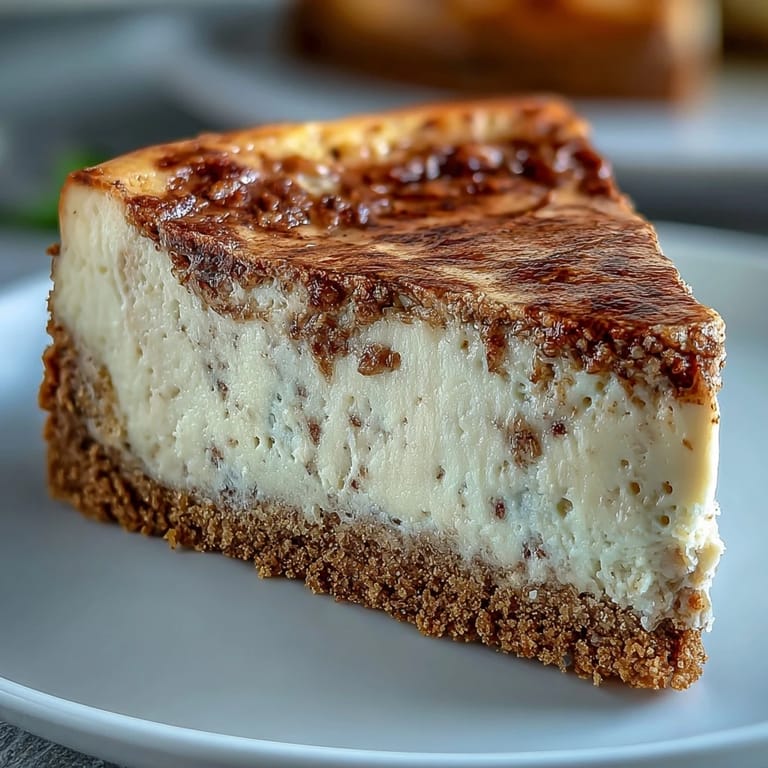
The Swirl Technique That Actually Works
I've seen people stress out over getting a perfect marble pattern, but honestly, the goal isn't Instagram perfection—it's distributing the hojicha flavor throughout so every bite has some of that tea essence. Drop the hojicha batter in a loose pattern, then drag your skewer through it a few times in different directions, almost casually. Overdoing it blends everything together into an even brown, which looks less interesting and loses the visual drama of the contrast between light and dark.
Serving and Storage Tips
This cheesecake actually tastes better the next day once flavors have settled, and it keeps beautifully in the fridge for up to four days in an airtight container. If you're feeling fancy, dust each slice with a tiny pinch of hojicha powder just before serving, or add a small dollop of lightly whipped cream on top for extra richness.
- A hot, damp knife dipped in water and wiped clean between slices gives you neat, clean cuts without dragging through the filling.
- The cheesecake can be frozen for up to two months—wrap it well and thaw slowly in the fridge before serving.
- Room temperature cheesecake tastes duller; cold brings out all the nuanced flavors, so always serve it chilled.
 Save to Pinterest
 Making this cheesecake has become less about following instructions and more about trusting the process—and trusting yourself to know when something is done. That's when cooking stops feeling like a chore and starts feeling like something worth sharing.
Recipe Questions & Answers
- → What does hojicha taste like in cheesecake?
Hojicha imparts a nutty, toasty flavor with caramel undertones that complements the rich cream cheese filling. The roasted tea notes create a sophisticated balance without being bitter, similar to coffee but more delicate and slightly sweet.
- → Can I use matcha instead of hojicha?
Yes, though matcha will provide a grassier, more vibrant flavor profile compared to hojicha's roasted notes. The preparation method remains the same, but the taste will be distinctly different with more vegetal undertones.
- → Why does my cheesecake crack?
Cracks typically occur from overbaking or cooling too quickly. The method of cooling in the oven with the door cracked prevents this by allowing gradual temperature reduction. Using a water bath can also help maintain consistent moisture.
- → How long should I chill the cheesecake?
Minimum five hours, though overnight chilling yields the best texture and flavor development. The extended resting time allows the tea infusion to mature and the filling to set completely for clean slices.
- → Can I make this gluten-free?
Substitute gluten-free graham crackers or almond flour for the crust, and replace the all-purpose flour with cornstarch or arrowroot powder. The remainder of the ingredients are naturally gluten-free.
- → What's the best way to achieve the marble swirl?
Drop spoonfuls of the hojicha batter randomly over the plain filling, then use a skewer or knife to gently swirl through both layers without overmixing. One or two figure-eight motions creates the ideal marbled pattern.